
To open ReadySuite Admin
- On the Start menu, select Compiled > ReadySuite Admin.

- On the License Manager dialog box Register drop down list, select Install Serial.
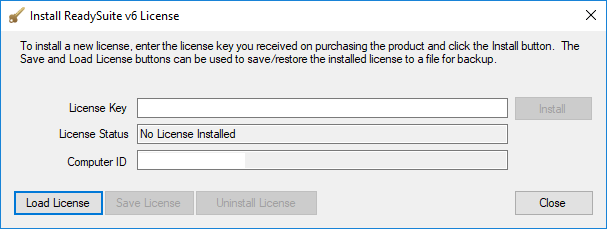
- Enter the License Key provided to you by the ReadySuite Sales and/or Support Team. (This would have been e-mailed to you when you requested a trial license or purchased a license from our store.)
License Status: Indicates if the license is currently installed.
Computer ID: Your license key will be tied to this computer ID.
Note: If the installation process fails, the Authentication Error message box enables you to save a license key (.lic) file for offline authorization. Click Yes to save this file to a location on your computer (such as your desktop) and attach it to an e-mail to our sales team at readysuite@ediscovery.com. We will provide you with an authenticated license file once received.
Alternatively, you can use our offline license site to activate the license file:
https://authentication.compiled.com/AuthenticateFile.aspx
- Click Install.

- Right-click on the license and select Details.

- On the License Details dialog box Network section. view the number Active and Allowed licenses.


To connect ReadySuite to the administrative and licensing service (ReadySuite Admin)
- On the ReadySuite Options page menu bar, click License.
- On the License Manager dialog box, click the Register drop list and select Install Network.

- On the Install Network License dialog box License Server section, enter the Server Address (IP address or host name) of the licensing service (where you installed ReadySuite Admin).
- Click OK.
- To verify the license is active, on the License Manager dialog box, right-click on the license and select Details. On the License Details dialog box Network section. view the Active license.
